Skip to content

# download gitea binary
wget -O gitea1.9.3.xz https://github.com/go-gitea/gitea/releases/download/v1.9.3/gitea-1.9.3-linux-amd64.xz

# extract archive
unxz gitea1.9.3.xz

# check binary integrity
cat https://github.com/go-gitea/gitea/releases/download/v1.9.3/gitea-1.9.3-linux-amd64.sha256
sha256sum gitea1.9.3

# make binary executable
chmod +x gitea1.9.3

# move gitea binary to final location
mv gitea1.9.3 /usr/local/bin/

# create symbolic link to current version
ln -s /usr/local/bin/gitea1.9.3 /usr/local/bin/gitea

# create system user to run gitea
adduser \
--system \
--shell /bin/bash \
--gecos 'Gitea' \
--group \
--disabled-password \
--home /home/gitea \
gitea

# create directories and permissions
mkdir -p /var/lib/gitea/{custom,data,log}
chown -R gitea:gitea /var/lib/gitea/
chmod -R 750 /var/lib/gitea/
mkdir /etc/gitea
chown root:gitea /etc/gitea
chmod 770 /etc/gitea

# create gitea service
# https://github.com/go-gitea/gitea/blob/master/contrib/systemd/gitea.service
nano /etc/systemd/system/gitea.service

[Unit]
Description=Gitea
After=syslog.target
After=network.target
#Requires=mysql.service
Requires=mariadb.service
#Requires=postgresql.service
#Requires=memcached.service
#Requires=redis.service

[Service]
# Modify these two values and uncomment them if you have
# repos with lots of files and get an HTTP error 500 because
# of that
###
#LimitMEMLOCK=infinity
#LimitNOFILE=65535
RestartSec=2s
Type=simple
User=gitea
Group=gitea
WorkingDirectory=/var/lib/gitea/
ExecStart=/usr/local/bin/gitea web -c /etc/gitea/app.ini
Restart=always
Environment=USER=gitea HOME=/home/gitea GITEA_WORK_DIR=/var/lib/gitea
# If you want to bind Gitea to a port below 1024 uncomment
# the two values below
###
#CapabilityBoundingSet=CAP_NET_BIND_SERVICE
#AmbientCapabilities=CAP_NET_BIND_SERVICE

[Install]
WantedBy=multi-user.target

# enable and start service
systemctl enable gitea
systemctl start gitea

# create database and user
mysql -u root

CREATE DATABASE gitea;

CREATE USER 'gitea'@'localhost' IDENTIFIED BY 'password';

GRANT SELECT, INSERT, UPDATE, DELETE, DROP, INDEX, ALTER, CREATE, CREATE TEMPORARY TABLES, CREATE VIEW, EVENT, TRIGGER, SHOW VIEW, CREATE ROUTINE, ALTER ROUTINE, EXECUTE ON `gitea`.* TO 'gitea'@'localhost';
FLUSH PRIVILEGES;

# create SSH tunnel between server and local machine for port 3000
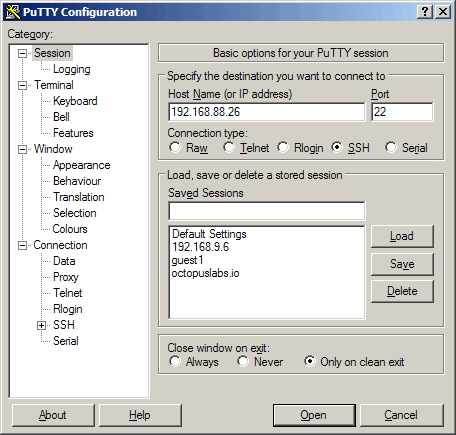
ssh user@octopuslabs.io -i private.pem -L 3000:localhost:3000 -N -v

# install gitea through browser
http://localhost:3000/install

# create the first user account which will be the main admin
http://localhost:3000/register

# once installation is complete, update permissions
chmod 750 /etc/gitea
chmod 640 /etc/gitea/app.ini

# to use gitea without SSH tunnel and on default port 80, we setup gitea running through apache reverse proxy
# add to apache site https config

...


Order allow,deny
Allow from all

AllowEncodedSlashes NoDecode

# Note: no trailing slash after either /git or port
ProxyPass /gitea http://localhost:3000 nocanon
ProxyPassReverse /gitea http://localhost:3000

# enable apache proxy module
a2enmod proxy_http

# restart apache
systemctl restart apache2

# edit gitea config
[server]
ROOT_URL = https://octopuslabs.io/gitea/

# restart gitea service
systemctl restart gitea

# test in browser
https://octopuslabs.io/gitea/

# enable git lfs support
LFS_START_SERVER = true
LFS_CONTENT_PATH = /home/gitea/data/lfs

# hide gitea from search engine
You may want to hide your gitea installation from search engines...

# tweak gitea configuration
https://github.com/go-gitea/gitea/blob/master/custom/conf/app.ini.sample

Debugging php code on a production server using xdebug is a pain to get working.
This guide will help you set it up and make sure it works.

Server Operating System: Ubuntu 18.04.3 LTS, apache and php fpm
Client Operating System: Windows 10, PHPSTORM

# install xdebug on production server
apt install php-xdebug

# xdebug gets automatically activated for all 3 php clients
# disable xdebug for all php cli, apache2 and fpm
phpdismod xdebug

# edit xdebug config
nano /etc/php/7.2/mods-available/xdebug.ini

# https://xdebug.org/docs/basic
zend_extension=xdebug.so

# remote debugger
xdebug.remote_enable=1
xdebug.remote_host=127.0.0.1
xdebug.remote_port=9001 # use port 9001 as 9000 is used by php-fpm
xdebug.remote_log = "/var/log/xdebug/xdebug.log"

# make xdebug log directory
mkdir -p /var/log/xdebug

# and make it owned by www-data
chown www-data:www-data /var/log/xdebug

# enable xdebug for php fpm only
phpenmod -s fpm xdebug

# restart php
systemctl restart php7.2-fpm

# create test page to check if xdebug is working - check for xdebug section in phpinfo()
<?php
function test()
{
echo "Called @ ".xdebug_call_file() .":". xdebug_call_line() ." from". xdebug_call_function();
}
test();
phpinfo();

# install browser plugin
Firefox https://addons.mozilla.org/en-GB/firefox/addon/xdebug-helper-for-firefox/
Chrome https://chrome.google.com/extensions/detail/eadndfjplgieldjbigjakmdgkmoaaaoc
Opera https://addons.opera.com/addons/extensions/details/xdebug-launcher/?display=en

Chromium - first install it to chrome, then in chromium go to extensions, activate developer mode and load the extension from

C:\Users\USER\AppData\Local\Google\Chrome\User Data\Default\Extensions\eadndfjplgieldjbigjakmdgkmoaaaoc

# set browser plugin IDE key to PHPSTORM

# create SSH tunnel between the server and the local machine
The cool thing about the SSH tunnel between the server and the local machine is that it will work whatever firewall settings and network configuration.

ssh user@server.com -i private-key.pem -R 9001:localhost:9001 -N -v

# setup PHPSTORM
* in run menu: start listening for debug connections + break on first line
* file > settings > PHP > Debug > XDebug > port 9001

# happy debugging!

# profile php code
# https://xdebug.org/docs/profiler

# enable profiler globally
;xdebug.profiler_enable = 1

# enable profiler if trigger is used
xdebug.profiler_enable_trigger = 1
xdebug.profiler_enable_trigger_value = "hello"

;xdebug.profiler_append = 1
xdebug.profiler_output_dir = "/var/log/xdebug"
;xdebug.profiler_output_name = "callgrind.out.%t-%s"
xdebug.profiler_output_name = "cachegrind.out.%s.%H"

# start profiler
https://server.com/?XDEBUG_PROFILE=hello

3

Surveillance cameras are big business and way too expensive when you want to buy one from a reputable brand. Here's an example: Logitech Alert 750e Outdoor Master Security Camera System with Night Vision currently sells at US$999.

In this post I'll show you how to build your own surveillance camera for fun and for way cheaper. Let's get started.

For this, you'll need:

  1. a Raspberry Pi 2
  2. a 16GB micro SD card for the Raspberry software
  3. your favorite USB webcam
  4. an Ethernet cable and a router with at least one RJ-45 free LAN slot
  5. And of course a computer with an SD card reader

raspberry-pi-setupsd-card

  • The first step is to download and install the operating system for the Raspberry Pi. While Raspbian the official Linux OS for the Raspberry Pi is an option, I didn't like it that much as there are way too many things that get automatically installed on it. I decided to go the leanway by installing Debian Jessie instead. Download it from here https://sjoerd.luon.net/posts/2015/02/debian-jessie-on-rpi2/ (latest image at https://images.collabora.co.uk/rpi2/jessie-rpi2-20150705.img.gz) then extract the gzip archive and use Win32DiskImager to write the downloaded image to the SD card.win32-disk-imager
  • Eject the SD card and insert it into the Raspberry Pi, then power the Raspberry using the micro-USB slot. Also connect the Raspberry to your router using Ethernet cable.
  • The Raspberry Pi will automatically boot on the SD card pre-installed image, establish an network connection and the SSH deamon will be listening for us. But first we need to find its IP address. For that we can use nmap which is a network scanner. Download and install nmap then open a command prompt .
  • In the command prompt type ipconfig. This will provide valuable info about our local network. As you can see, my IP address is 192.168.88.47.ipconfig-result
  • Now we scan the network using nmap -p22 192.168.88.2-192.168.88.254 (replace 88 with your local flavor). What this does is to scan the whole local network (except for the gateway) for devices listening on port 22 which is the SSH default port.nmap-results
  • In this example, you can see that 6 devices are present (my computer included) and among them are 4 Raspberry Pi. Now that we have its IP address we can establish a connection using SSH. Probably the best SSH option on Windows is Putty. Download and install it.
  • Start Putty and enter the IP address of the Raspberry Pi under Host name then click openputty-connect
  • The default login is root/debianlogin-as-root
  • Start by changing the root password using the passwd commandpasswd
  • Update the system: apt-get update then apt-get upgradeapt-get-update
  • Update the Raspberry date, time and timezone.
    1. apt-get install ntpdate
    2. ntpdate pool.ntp.orgntpdate
    3. cp /usr/share/zoneinfo/Europe/Riga /etc/localtime to set the time zone (adjust to your flavor)set-timezone
  • Install sudo and add a user account: apt-get install sudo then adduser yourusersudo-adduser
  • Make the new user a system administrator: sudo adduser cat sudosudo-adduser-2
  • Now that we created the user account, let's disconnect from this session and reconnect but with the user account this time. Now let's remove the possibility to login as root. sudo passwd -l rootremove-root-loginIf you want to learn more about why it's important to disable root login...
  • Add USB utilities: sudo apt-get install usbutils
  • Check that your camera is detected: lsusb detect-usb-camera
  • Install the camera software: sudo apt-get install motioninstall-motion
  • Backup the motion configuration file: sudo cp /etc/motion/motion.conf /etc/motion/motion.conf.bak
  • Edit the motion configuration file: sudo nano /etc/motion/motion.conf
  • Here's the list of changes I made on mine
    logfile /var/motion/motion.log
    width 1280
    height 960framerate 5quality 95

    #sdl_threadnr 0

    snapshot_interval 360

    target_dir /var/motion

    snapshot_filename snapshot-%Y-%m-%d_%H%M%S-%v
    picture_filename motion-%Y-%m-%d_%H%M%S-%v-%q-%v
    movie_filename movie-%Y-%m-%d_%H%M%S-%v
    timelapse_filename timelapse-%Y-%m-%d
    stream_quality 95
    stream_motion on
    stream_localhost off

Save the file CTRL + O and exit nano CTRL + X

  • Create dir /var/motion/ : sudo mkdir /var/motion and assign ownership to motion: sudo chown motion:motion /var/motionmotion-dir
  • Start the motion deamon when the system starts: sudo nano /etc/default/motion and set daemon to yes
  • Test if everything works accordingly: sudo service motion restart
  • After a few seconds check if any content was generated in the motion target dir: ls /var/motion/ -lmotion-test
  • And even better, you can now also access the live stream server at https://192.168.88.26:8081 . Well that's it! If you have any issues or problems, just report them in the comments section.live-stream
  • Update: if you notice after reboot that no photos are being captured, here's how to troubleshoot: sudo service motion status. This will show the status of the motion service and will show any errors that could have occurred. It's usually permission issues on the motion config file or the motion log file which can be fixed with chown and chmod.

Windows 10 now being definitely released, I wanted to have a fresh look at it and decided to install it. As I want to keep my current installation of Windows 7 for the time being, I opted to install it on a second internal hard drive I have on my fantastic Folio 9470m (it has 2 HD slots: one for a standard 2.5" SATA drive and another for a mSATA micro-drive).

Unfortunately this turned into a really frustrating fiasco as the installer is not letting me decide anything!

The only options I have is to upgrade my current Windows 7 to Windows 10 or make a Windows 10 clean install!!! WTF?

windows10-installation-2

While I certainly understand the installation process should be kept as simple as possible for the non-techy crowd, I simply refuse to imagine that the people in charge of UI have not thought about any other options.

For now I'm just going to enjoy doing other stuff instead of trying to find the hack for this ocean of frustration...